
Toilet Flushes Slow:5 Reasons And Solutions
Sometimes, when your toilet flushes slow, it can feel more like a sluggish stream than a powerful waterfall. This means you’re dealing with a weak

Are you tired of stumbling in the dark during those late-night bathroom runs? Fear not, dear reader, for today, we dive into the fascinating realm of the “toilet light.”
In this whimsical blog post, we embark on an enlightening adventure to create a reactive toilet light that not only brightens your bathroom but also adds a touch of magic to your daily routine.
Before we delve into the intricacies of creating your very own reactive toilet light, let’s take a moment to appreciate the importance of illumination in the bathroom. A well-lit bathroom is not only functional but also essential for safety and comfort.
Safety First
Stumbling around in the dark can lead to accidents and discomfort. A toilet light ensures you can see where you’re going, reducing the risk of tripping or bumping into things.

Convenience and Comfort
Late-night bathroom visits should be as hassle-free as possible. A toilet light eliminates the need to fumble for light switches, making your nighttime routines more convenient and comfortable.
Energy Efficiency
Traditional bathroom lighting can be too bright for nighttime use, wasting energy and disturbing your sleep patterns. A toilet light provides just the right amount of illumination, conserving energy and creating a calming atmosphere.
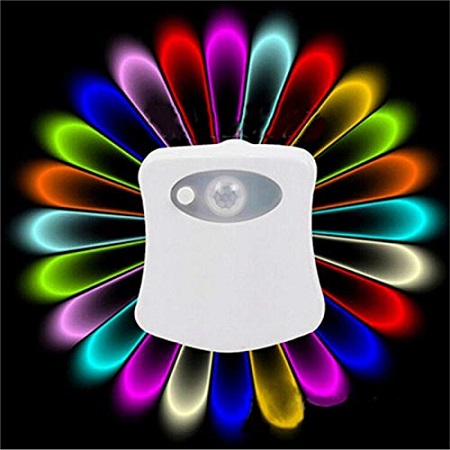
When it comes to crafting the perfect toilet light, understanding LED technology is key. LEDs, or Light Emitting Diodes, are the unsung heroes behind the scenes. These little wonders offer efficient illumination and are the ideal choice for our endeavor.
LEDs are energy-efficient and long-lasting, making them perfect for our toilet light project. They come in various colors, allowing you to customize the ambiance in your bathroom. Whether you prefer a soothing blue or a vibrant rainbow, LEDs can make it happen.
To create a toilet light that reacts to your presence, we must choose the right sensor. There’s a plethora of options, from motion sensors to infrared detectors. Let’s explore these possibilities and find the sensor that suits our whimsical needs.
Motion Sensors
Motion sensors are a popular choice for reactive toilet lights. They can detect movement within their range and trigger the light accordingly. When you enter the bathroom, the sensor senses your presence and activates the light, ensuring you never fumble in the dark again.
Infrared Sensors
Infrared sensors are another excellent option. They work by detecting heat signatures, so when you approach the toilet, the sensor picks up your body heat and turns on the light. It’s like having a warm welcome in your bathroom every time!
Ultrasonic Sensors
Ultrasonic sensors use sound waves to detect motion. When you enter the bathroom, the sensor sends out ultrasonic waves, and if these waves are disrupted by your presence, it triggers the light. Ultrasonic sensors are highly sensitive and can work well for our toilet light project.
Choosing the Right Sensor for You
The choice of sensor largely depends on your preferences and the specific requirements of your bathroom. Motion sensors are great for larger spaces, while infrared sensors are energy-efficient and can work well in smaller bathrooms. Ultrasonic sensors offer high sensitivity but may require more fine-tuning.
Now, let’s get down to the nitty-gritty of assembling our electrical circuit. We’ll guide you through the process, making sure you connect the dots (and wires) correctly. Don’t worry; it’s not as shocking as it sounds!
The key components of our electrical ensemble include the LED strip, the sensor, and a power source. The LED strip provides the light, the sensor detects your presence, and the power source keeps it all running smoothly.
While the exact wiring process may vary depending on your chosen components and their specifications, the general steps are as follows:
Always follow the manufacturer’s instructions for wiring and consult relevant guides and tutorials for your specific components.
Our reactive toilet light needs a little brainpower to know when to shine. In this section, we delve into the mystical realm of programming microcontrollers. Don’t fret; it’s more Harry Potter than rocket science!
Microcontrollers are like the wizards of the electronic world. They receive input from the sensor and command the LED strip to light up when someone enters the bathroom. Programming them is akin to casting a spell – you need the right incantations (code) to make it work.
If you’ve chosen to include a microcontroller in your setup, you’ll need to program it to interact with the sensor and control the LED strip. Most microcontrollers have user-friendly programming environments and plenty of online resources to guide you through the process.
Here are the general steps for programming your microcontroller:
In addition to microcontroller programming, you may need to configure your sensor. Many sensors come with adjustable settings, such as sensitivity and timeout duration. Fine-tuning these settings ensures that the sensor responds accurately to your presence and doesn’t turn off too quickly while you’re still in the bathroom.
Now that we’ve created our masterpiece, it’s time to install our toilet light. We’ll discuss the perfect spot to place it, ensuring you have a bathroom that’s both well-lit and aesthetically pleasing.
Ideal placement
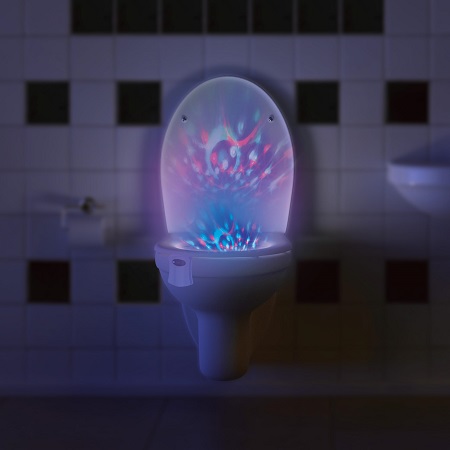
The ideal placement for your toilet light is on the inner rim of the toilet seat cover. This location ensures even lighting and conceals the light source, creating a visually pleasing effect. It’s also a practical choice as it won’t interfere with your daily bathroom activities.
When installing, make sure to clean the area thoroughly to ensure proper adhesion. Whether your toilet seat is made of porcelain or plastic, a clean surface will help the adhesive bond securely.
Securing the components
Ensure that all components, including the sensor, microcontroller (if applicable), and wiring, are securely fastened and do not obstruct the functionality of the toilet seat. Loose or improperly placed components can lead to issues and safety concerns.
Before we celebrate our toilet light triumph, it’s crucial to test and tweak our creation. We’ll ensure it reacts seamlessly to your presence and doesn’t have any unexpected “light bulb” moments.
Functional Testing
Begin by conducting functional tests to ensure that your toilet light responds appropriately when you enter the bathroom. Walk in and out several times, paying close attention to how quickly the light turns on and off. Make note of any delays or inaccuracies.
Sensor Sensitivity
If your toilet light has adjustable sensor settings, such as sensitivity, this is the time to fine-tune them. Adjust the settings to optimize the sensor’s response to your presence. You want it to activate reliably when you enter the bathroom and stay on as long as needed.
Code Debugging
If you’ve encountered any issues with the programming of your microcontroller, now is the time to debug and make necessary adjustments. Ensure that the code operates smoothly and doesn’t cause any unexpected behaviors.
Battery or Power Source Check
If your toilet light operates on batteries, periodically check and replace them as needed to ensure uninterrupted operation. Keep spare batteries on hand to avoid inconvenience in case of a power outage.
Our toilet light isn’t just an ordinary bathroom accessory. It’s a source of amusement and interaction. Discover how it adds a sprinkle of enchantment to your daily routines.
The Magic of Interaction
Imagine walking into the bathroom, and your toilet light welcomes you with a soft, soothing glow. It’s like having a personal concierge for your bathroom visits. You can even customize the color to match your mood or create a festive atmosphere for special occasions.
Personalizing Your Bathroom Experience
Experiment with different colors to create a unique ambiance in your bathroom.
Match the lighting to your mood or even coordinate with special occasions.
Impress your guests with a bathroom that offers a memorable visual experience.
To keep your DIY toilet light in top-notch condition, follow these maintenance tips:
Regular Battery Checks
If your toilet light uses batteries, periodically check and replace them as needed to ensure uninterrupted operation.
Keep spare batteries on hand to avoid inconvenience in case of a power outage.
Cleaning the LED Strip
Clean the LED strip and sensors periodically to prevent dust buildup, which can affect its performance.
Use a soft, damp cloth or a gentle cleaning solution to maintain the clarity of the light.
Replacing the LED Strip
If your LED strip loses its adhesive properties or experiences technical issues, it’s best to replace it with a new one for a secure fit and continued functionality.
When dealing with electrical components, it’s essential to prioritize safety. Here are some safety tips to keep in mind during the installation process:
In conclusion, creating a reactive toilet light is not just a DIY project; it’s a journey into the world of whimsical bathroom innovation. With LED technology, the right sensor, and a dash of programming, you can transform your ordinary bathroom into a magical space.
So, go ahead, embark on your own toilet light adventure, and bask in the delightful glow of a bathroom that responds to your presence. Say goodbye to stumbling in the dark and hello to the enchanting world of the toilet light. It’s time to make your bathroom experience truly illuminating!